
Overview
The Build Pipeline tab in the investor model shows the projected construction cashflow across all active sites — i.e. when money needs to go out the door to pay for building work, quarter by quarter.
Unlike the other tabs, the Build Pipeline requires manual configuration before it will show any data. This is because each site has its own build schedule, cost structure, and groundwork contractor with different payment terms. This guide explains how to set everything up.
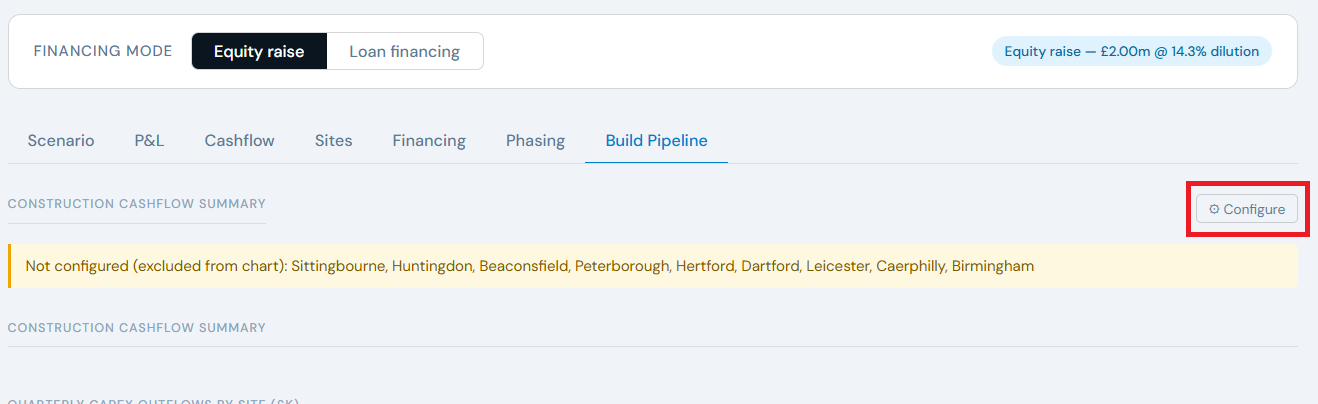
Opening the Configure Panel
Click the ⚙ Configure button at the top of the Build Pipeline tab. This opens a panel with two tabs:
- Groundwork Contractors — the companies providing groundwork services, and their payment terms
- Site Configuration — per-site settings including lead time, contractor assignment, and how each category of spend is split
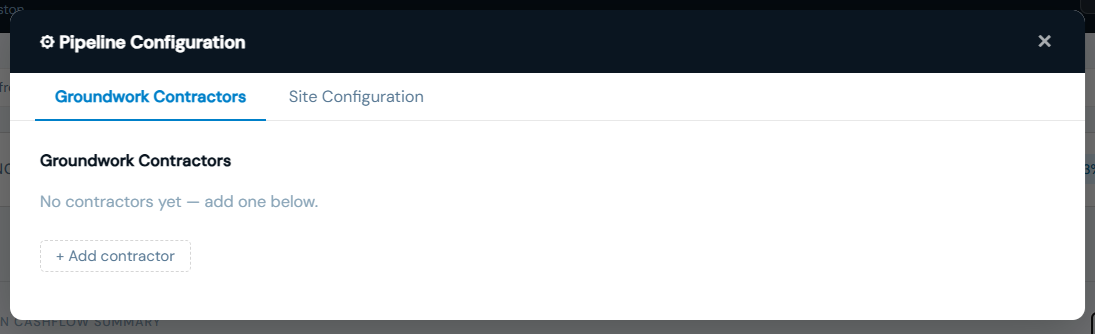
You can close the panel at any time by clicking ✕ Close or clicking outside the panel. Unsaved changes will be lost.
Groundwork Contractors
This tab maintains the list of groundwork companies used across the pipeline. Each contractor has a name and a payment schedule — the staged structure by which they draw down their fees during construction.
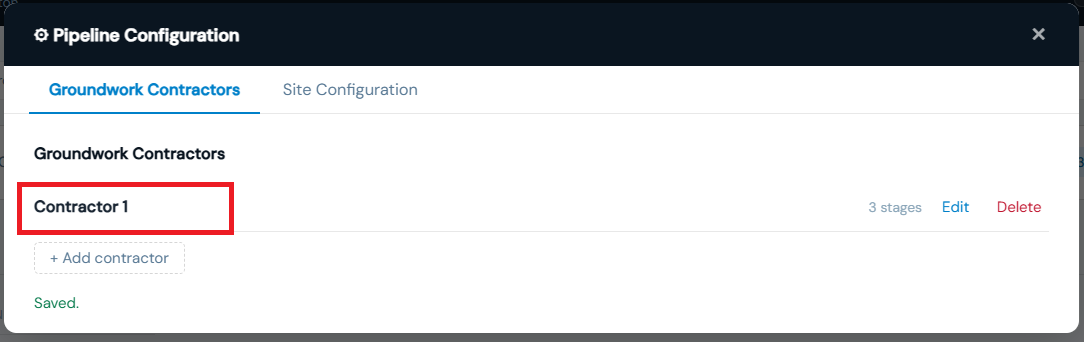
Adding a new contractor
- Click + Add Contractor
- Enter the contractor's name
- The editor defaults to three stages — rename them and set the % of cost and Months from start for each
- Use + Add stage to add more stages, or ✕ to remove one
- The Total indicator must show 100% before saving
- Click Save to SharePoint
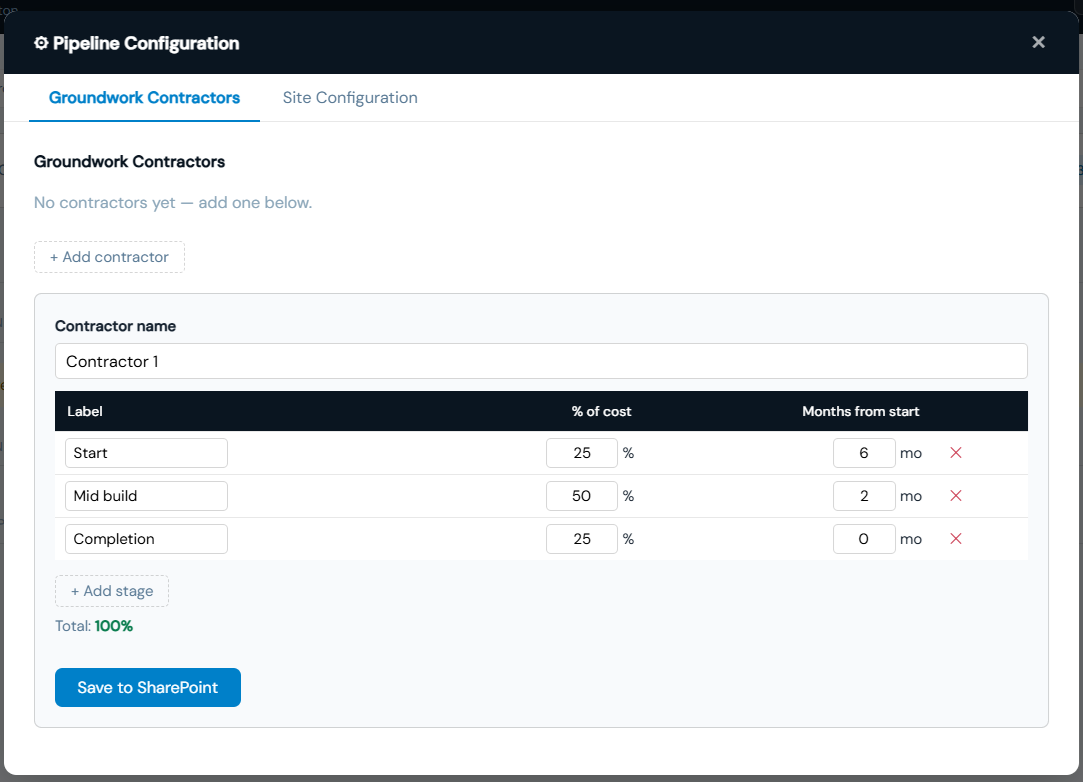
Understanding the payment stage fields
- Label — a description of the stage (e.g. Mobilisation, Mid-build, Completion). This is for your reference only.
- % of cost — the proportion of the groundworks cost that is due at this stage. All stages must sum to 100%.
- Months from start — how many months after construction begins this payment falls due. Month 0 = construction start date (which itself is the opening date minus the lead time). A stage at month 3 is 3 months into the build.
Editing an existing contractor
Click Edit next to any contractor to open their stage editor. Make changes and click Save to SharePoint. The chart will update on the next page load or when you re-open the pipeline tab.
Deleting a contractor
Click Delete next to a contractor. You will be asked to confirm. A contractor cannot be deleted if it is currently assigned to a site — remove it from all sites first.
Site Configuration
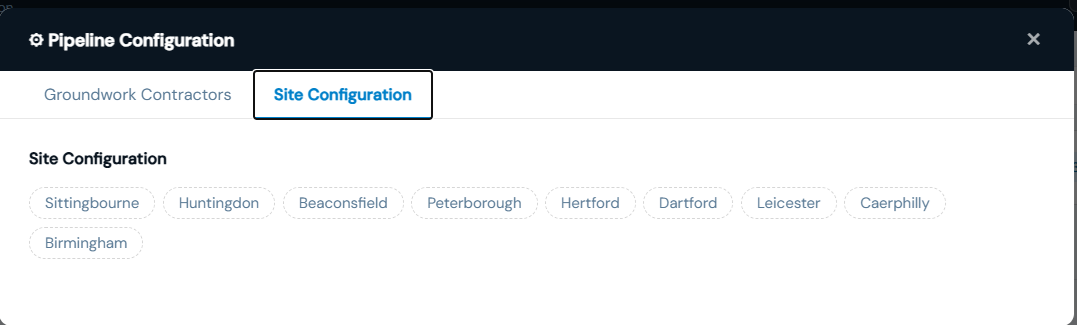
This tab lets you configure each site individually. Select a site from the list at the top of the panel.
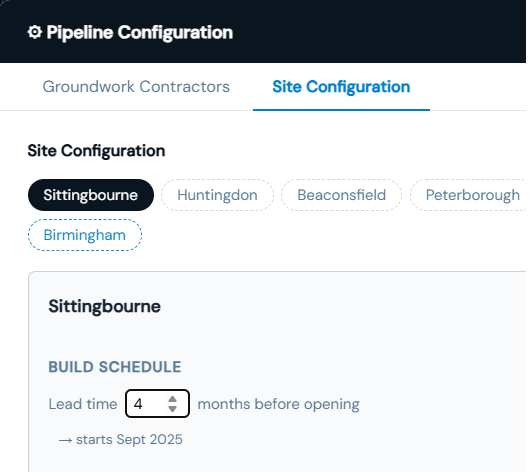
Build Schedule — Lead Time
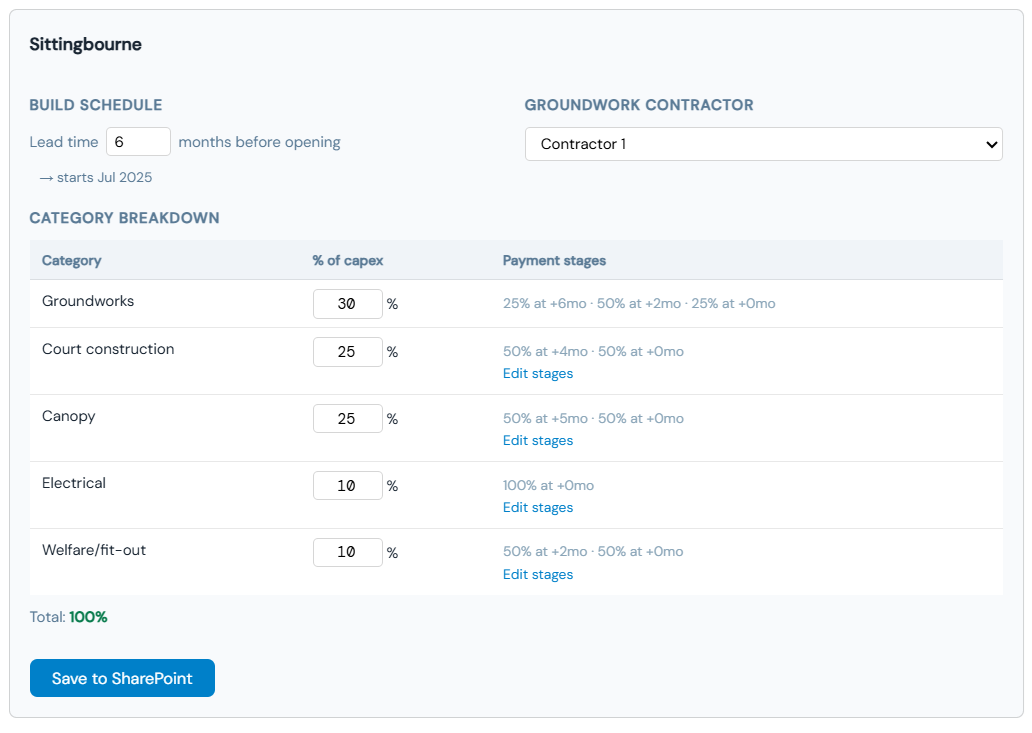
The Lead time field sets how many months before the site's opening date construction begins. For example, a lead time of 6 means that if the site opens in January 2027, construction starts in July 2026.
All payment stage dates are calculated automatically from this construction start date. If a site's opening date changes in SharePoint, the entire payment schedule shifts with it — you do not need to re-enter anything.
Groundwork Contractor
Select the contractor from the dropdown. The groundwork payment stages you configured for that contractor will then be used automatically for this site's Groundworks category. You do not need to enter groundworks stages separately for each site — they are inherited from the contractor record.
If no contractor is selected, groundworks will show as "(assign a contractor above)" in the category breakdown and will not appear in the chart.
Category Breakdown
This table breaks the site's total capital expenditure (as entered in the Sites tab) into five construction categories. For each category, you enter the % of capex — the share of total build cost that falls into that category.
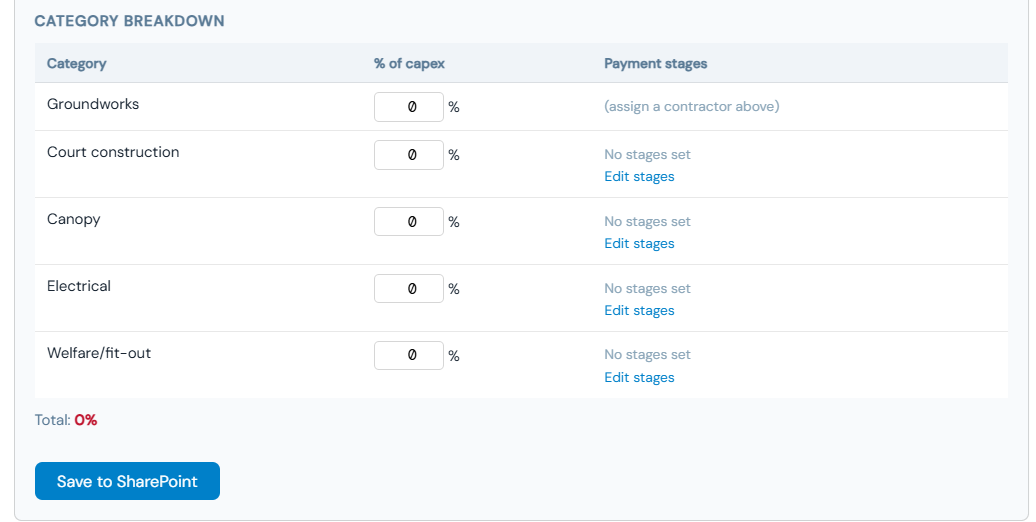
The five categories are:
- Groundworks — foundations, drainage, earthworks. Payment stages are taken from the assigned contractor (see above).
- Court construction — the court surfaces and fencing structures.
- Canopy — roof/cover structure where applicable.
- Electrical — power supply, lighting, and services.
- Welfare / fit-out — changing rooms, reception, and facilities fit-out.
Payment Stages (non-groundworks categories)
For all categories other than Groundworks, you can define their own payment stages by clicking Edit stages next to that category. This opens a stage editor identical to the contractor stage editor.
The same rules apply: stages must total 100%, and Months from start is measured from the construction start date (opening date minus lead time).
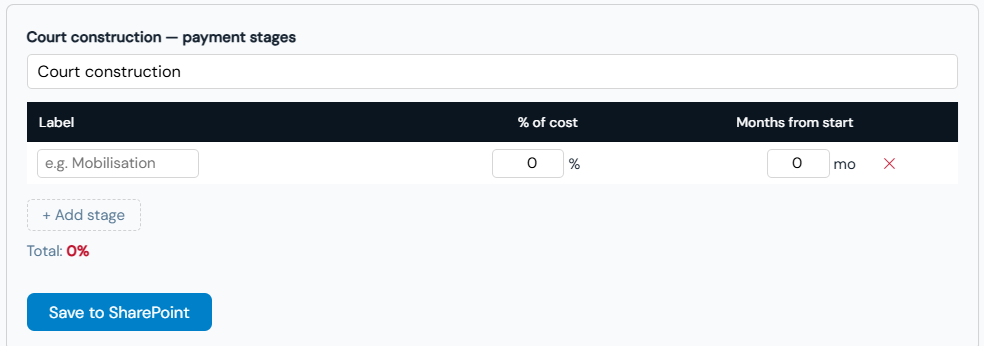
Once you are satisfied with the stages, click Apply to close the stage editor and return to the site configuration. The payment stages summary in the category row will update to reflect what you entered.
Saving a site configuration
Once you have set the lead time, contractor, category percentages, and payment stages for each category, click Save to SharePoint. A confirmation message will appear when the save is successful.
Reading the Build Pipeline Chart
Once sites are configured, the Build Pipeline tab displays a stacked bar chart showing projected construction cashflow by quarter. Each bar represents one quarter, and each colour within the bar represents a different site.
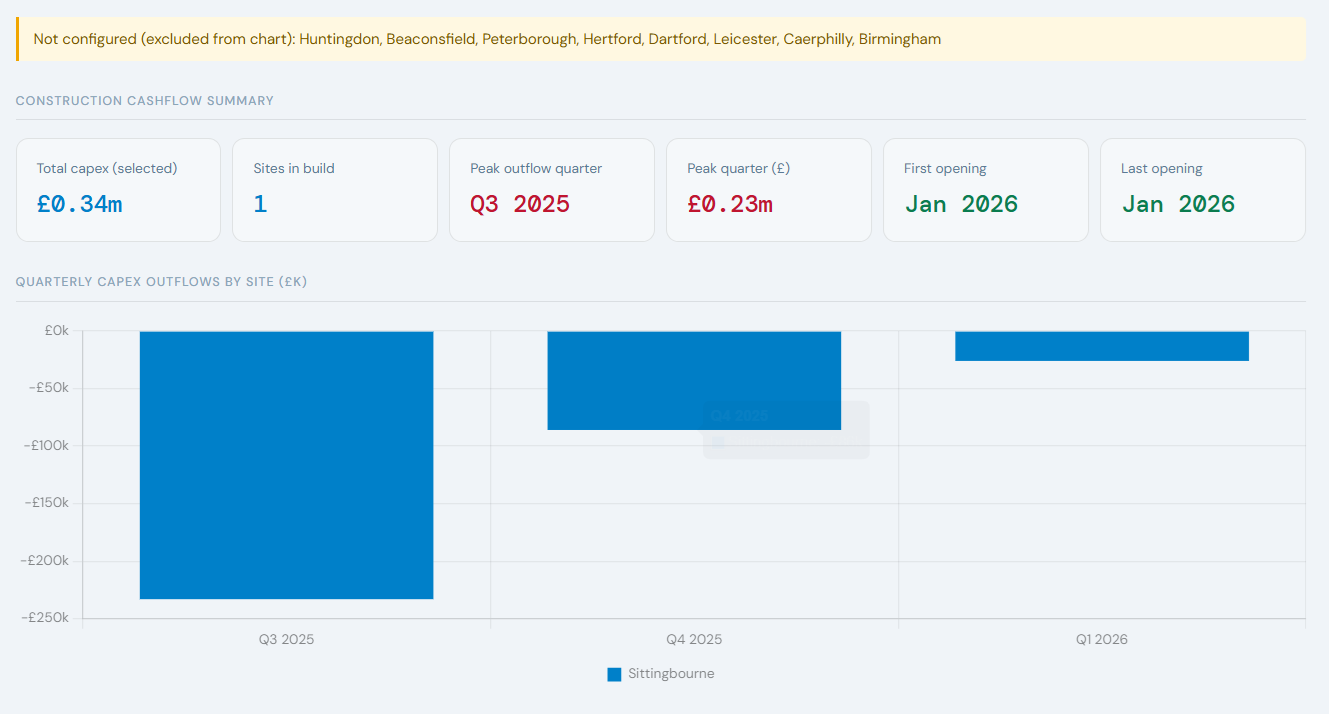
- Horizontal axis — quarters (e.g. Q1 2026, Q2 2026)
- Vertical axis — total construction spend in £ for that quarter
- Colour per site — each active site has its own colour in the legend; hovering over a bar segment shows the site name and amount
Only sites that are currently toggled active in the Sites tab are included in the chart. Unconfigured sites (those without lead time, contractor, and category breakdown entered) are listed in a banner above the chart rather than shown in the bars.
Ongoing Maintenance
When a new site is added
New sites added to SharePoint will appear in the site selector in amber (unconfigured). Open the Configure panel, select the site, and work through the lead time, contractor, and category breakdown as described above.
When a contractor changes their payment terms
Open the Configure panel → Groundwork Contractors → Edit the relevant contractor → update the stages → Save to SharePoint. All sites using that contractor will automatically reflect the updated terms the next time the model is loaded.
When a site's opening date slips
Update the opening date in the Sites admin (accessible from the Sites tab). No changes to the pipeline configuration are needed — the construction start date and all payment dates recalculate automatically.
Cleaning up test data
To remove test contractors or site configurations, the quickest method is to go directly to SharePoint → PipelineContractors or PipelineSiteConfig list → select the items → Delete. The model will reflect the cleared state on the next page load.